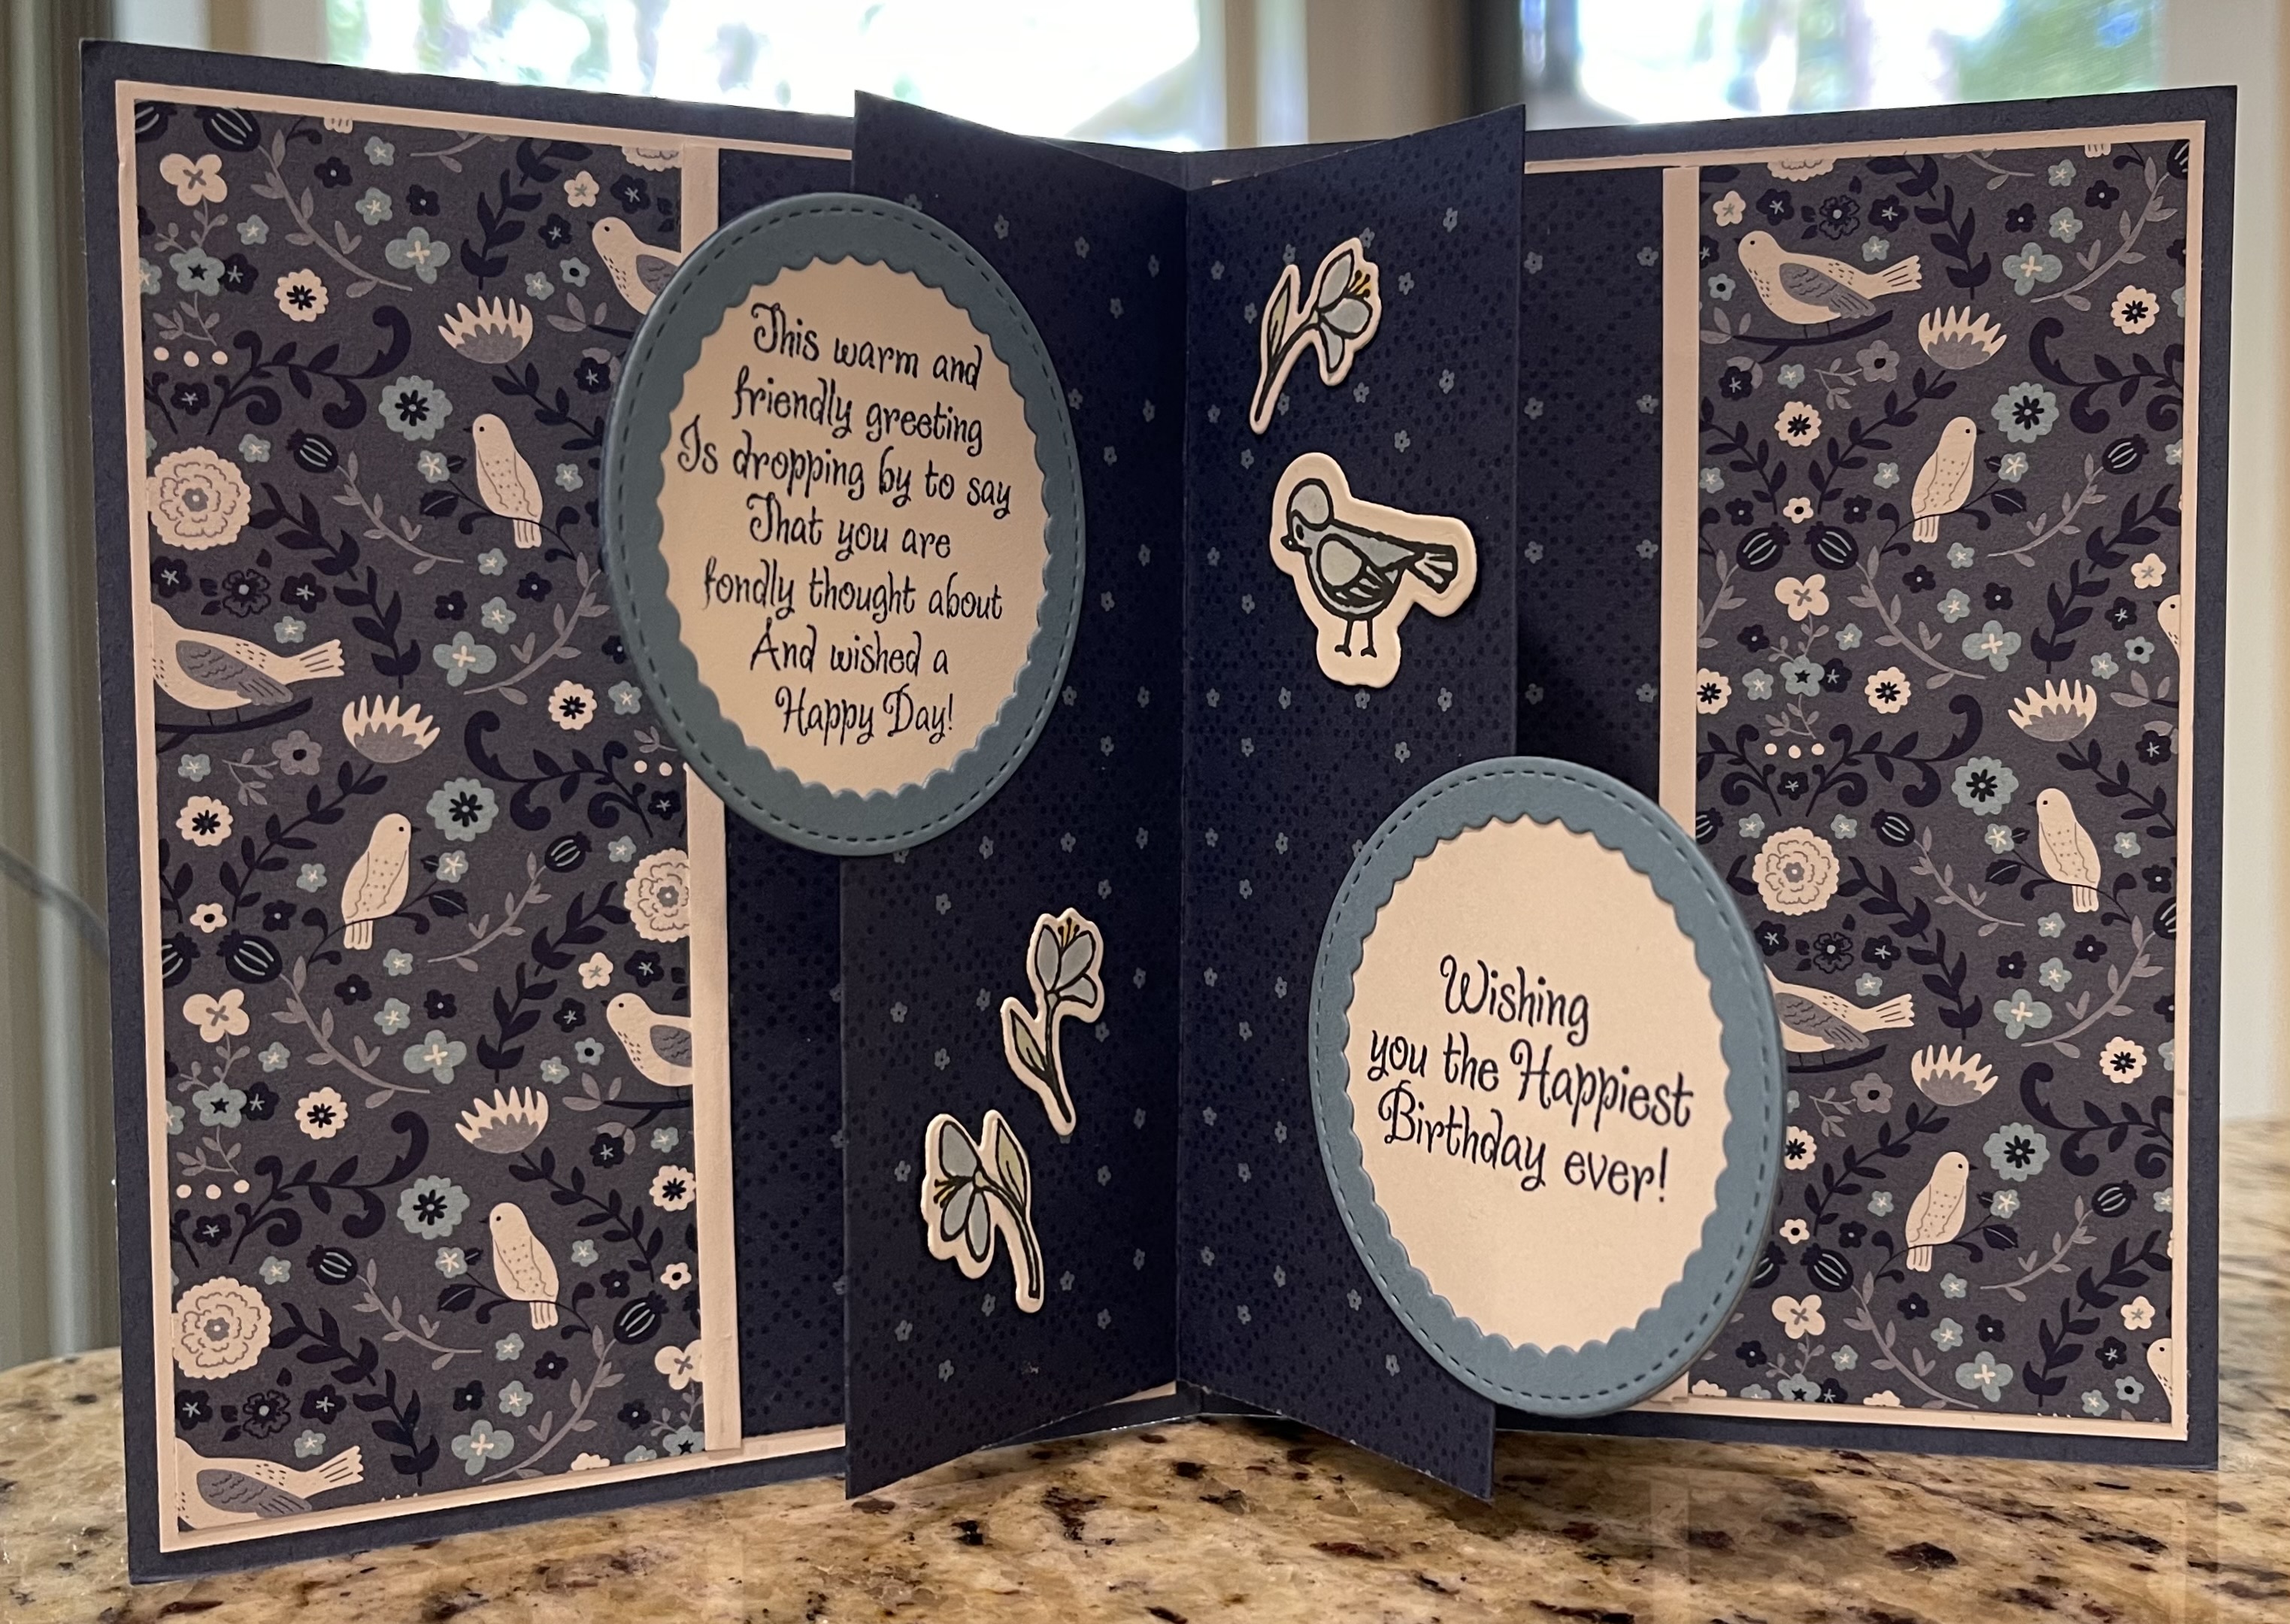
Monday, December 7, 2009

More Christmas Cards


Because this year I am making one of each instead of a bunch of one! I have to say due to how long it takes me to make a card to begin with, I am CASEing my cards in one away or another. These are pretty much exact replicas. I love them! They are gorgeous cards and were fun to make. These are 2 of the 4 my friend and I made on Friday together. The rose is embossed in gold e.p. then colored in with water color crayons. To make the swirl background we embossed the stamped swirl with holographic e.p. The first card is gold, black and white and the second card is soft suede, black and vanilla which is the color combo of the week on Splitcoast Stampers. Both were made using Nesties. The Martha Stewart branch punch made the spray above the ribbon - love that ribbon from Gina K! The background of the second one is a Cuttlebug embossing folder. That's about it! I have about 4 more Christmas cards ready to post and then I have to get making some more! Never mind addressing and mailing them :)

Saturday, December 5, 2009

A little Glitter


Playing with the sparkly stuff! The blue card with the large snowflake is the Stampin' Up die cut then blue chunky glitter was glued on. The paper in the back ground is Basic Grey I had around, trying to match that particular blue of the glitter wasn't easy. I punched a few more snowflakes and put some gems in them for more sparkle. The sentiment is embossed with white e.p. on the brilliant blue card stock which is also used as a base. The ribbon is an iridescent ribbon to add yet more, yes, sparkle! I saw this card all in pink that I just had to copy.

The second card of the reindeer is a sketch I followed, the snowflake is two snowflakes layered on top of each other with a pop dot in between and covered in clear chunky glitter. It is really pretty! The card stock is Riding Hood Red as is the ribbon, left over from last year's InColors from SU. I put some Stickles on the swirls in the antlers and the background paper had glitter of it's own. I love this Christmas paper pack, 40% off at Michaels for one and hello, BLUE for another! It is by SEI called Winter Song. Has a gorgeous red cardinal on one of the pages, not sure what to do with it as it is too big for a card, maybe a nice scrapbook page if I ever got back into that. I can't remember how long it has been, I have been so busy making cards! Oh but it has many pretty papers in it, you will see more as I have at least 20 more Christmas cards to make!

Friday, December 4, 2009

a Little Change of Scenery - Tim Holtz Style!


Tim Holtz is doing his 12 tags of Christmas again this year (bless you Tim!) It is 12 awesome tutorials on using many of the Ranger's/Adirondack/Stamper's Anonymous products which include distress inks, crackle paints, paint dabbers for paper crafts, etc. Each tag is Christmas themed and full of techniques and to die for ;) LOL! Gorgeous stuff, he is one of the most - if not the most, creative Stampers I have ever seen. OK 'nuf said.

Here is the link to day 3 which is what I worked on with my tag, however you can get to day 1,2 and today is day 4 etc. (Friday, Dec. 4th) by going to this link and clicking on the links at the top. I am showing this one because it is the one I did. He started doing this a couple years ago so over time I have bought nearly all of the products he uses so now this year I have no excuse but to try these techniques! This one is the plaid technique, using alcohol inks. Very easy actually. I made my tag similar to his and used the same color hardware he used but my tag was too dark and you couldn't see the hardware so I painted the pieces with white shimmer ink. My theme is "wish upon a star" and even put a little glitter in the star that is stamped on the tag. It looks cool, I even did a "Tim thing" and rubbed the ink off the tops of the brads to give it a worn look. The edges of the tag are sponged in black ink which decidedly the tag was once again too dark so then stamped the snowflake with lake colored paint dabber all around the edges on the black sponging. I didn't have white and lake is close, it is kind of an extremely light blue. The snow flakes actually look like the bleach stamping technique! All in all this is a departure from my clean, pretty and cute stuff but I like it. My plan is to do all of the techniques that I can but decided to start with this one. It's nice to get grungy every once in a while!


Wednesday, December 2, 2009

Snowman and Santa Boxes


Look at these cuties!!! I love them! This is the other project we made - once again we copied the project from some wonderful creative person who kindly shared it with all of us on the internet. Even my 7 year old son made them with us and he did an awesome job! They are boxes so you can put candy canes or candy bars or hot cocoa packets or whatever you like in them, the top of the box is open so you can use it as a decorative element too! Now it's your turn to make them and pass it on :)

Monday, November 30, 2009

Holly Berry House Stamp Ornament


My friend has this stamp and found a wonderful ornament that someone made with it so we decided to CASE it and wow, it came out so nice! We had to stamp and emboss the image 6 times on 6 different pieces of paper - then CUT OUT each layer LOL! Not the funnest one I have ever made - but not too bad :) The paper is Wassail by Basic Grey and that made it all the better, love that gorgeous paper. There are pop-dots or dimensionals between each layer and we used the Martha Stewart branch punch next to the holly. Not really much to say, stamp. emboss, cut, assemble! In the picture of the one we copied she had a picture of her daughter. I haven't put a picture on it yet but may if I decide to put it on the tree. I have another project to show tomorrow! Love all these Christmas projects to make and if you see some let me know - leave links in the comments so I can make even more!

Saturday, November 28, 2009

Christmas Card and Final Card from Quick Cards


Here is the final card of the 6 quick CASEs for the Survivor castoffs. Talk about clean and simple! And it looks nice, not just quick and easy! I love the twine and button, it adds just the right "oomph" to the card.

The Christmas card is very interesting. It is a piece of designer paper from the Wedding package of paper from Stampin' Up. This is a card that had directions on how to do this technique, you brayer or sponge the color ink you want over the white paper and go back and wipe it off with a paper towel and the shiny part of the pattern in the paper comes clean! It leaves it white and the color you put on remains in the background. Very cool. Sort of a reverse of the emboss resist technique. Then the rest is pretty straight forward, used card stock in reverse colors on each side to add some interest and then stamped the bulb and punched it then put it on with a dimensional. There is a jewel in the center also. The sentiment was stamped and cut to fit. Nothing fancy other than the paper and technique!

Today another friend came over and we made two fabulous projects I will show you next time. I just love it when friends come over and we make these projects and cards together! I hope you had a wonderful Thanksgiving and didn't gain any weight from it!

Wednesday, November 25, 2009

Card # 5 and More Christmas


Here is card #5 in the series of 6 and one more of the fabulous Christmas card CASEs we did recently. The first card is using orchid opulence which has been embossed with a Cuttlebug folder, the ink used is perfect plum and mellow moss and the strip of patterned paper is an older one from Stampin' Up. The butterflies are from a Martha Stewart punch and I painted in dots on the center with the white glimmer paint from SU.

The second card is from the Gina K. set - the window card she has on her site. The background white card stock is embossed with another Cuttlebug folder, for the main image panel the background is brayered with Kaleidecolor ink on glossy cardstock then stamped with Versamark and embossed with white e.p. Then cut into 4 squares and placed on the black card stock to give the window pane effect. We put a little bit of Stickles glitter on the tree branches. The sentiment is from the same set and I used Nestabilities dies to mount it. There is a tiny blue jewel in the center of the sentiment. That's about it! Happy Thanksgiving to everyone, I hope you have many things to be thankful for :)

Sunday, November 22, 2009

Card #4 and Christmas Card


The first card is one of the pretty cards my friend and I made the other day. It is a CASE of a card - I think it may be one of Gina K.'s design team cards. It was interesting trying to make the trees look like that, going down a hill and with some looking like they are in the distance in the background. The sponging was tricky too to get it to look kind of like it is glowing like the original. The card stock is all from Stampin Up but the designer paper is from Cosmo Cricket - Jolly by Golly again.

The Father's Day card is one of the quick cards, it is simple but nice. It is of course a CASE also, I used different stamps and colored papers. I started doing these because on Splitcoast every Sunday they have a featured stamper and you CASE one of that person's cards but must change two things about it and state what you changed. I got hooked on how quickly you could make a card without having to think so hard on all the details of what stamp, embellishments, colors, papers, technique, layout etc. I find it really hard to create, it takes me hours! It is not easy and natural for me so I really am amazed at the creations people come up with. I have been making cards for 5 years now and on occasion can come up with cool stuff on my own but not without hours of work! Oh well, I still enjoy it immensely :) Hope it is easier for you to make cards than me!

Saturday, November 21, 2009

Card 3 of Quick Cards - Christmas


Here is card #3 of the 6 I made for my Survivor cast offs. Just love this retired set, I never used it on my own at home but went to many workshops and used it on candles and such and now mounted it and made one for myself. The sentiment is from that teeny tiny wishes set again. I really like the lavender and green together on this card. That's all for today, I have 3 more of the quick cards and 3 Christmas cards that were a lot more work that I will post along with them in the next few days. I got a chance to "play" yesterday with my stamping buddy and friend, we worked on those cards all day! Well with a little break for lunch :) Until next time, have a GREAT day!

Lori

Wednesday, November 18, 2009

Two for today, One Quick and One Magnolia


Here are two cards today. I made a Magnolia Tilda with Kitty card today and wanted to share it along with one of the quick cards I am posting. I have a snowflake theme going here. The first card is one of the new Stampin' Up's Christmas papers, it is shiny and pretty but it doesn't show well here. I used the snowflake stamp from the latest collection also. I tried to find a good way to cut it out after I stamped it, I used Soft Suede for the ink. The pattern paper strip across the center is the back side of the larger pattern paper. I wish I didn't send this one off, I really like it! I guess I can always make more :)

The second card is using non-traditional colors for Christmas. The pattern paper is Jolly by Golly by Cosmo Cricket. I decided to use the ugly striped paper from it (my opinion LOL you may like it!) because well I always seem to want to save the pretty paper LOL! Next time I will use the pretty paper from the set. Yellow does not conjure up images of Christmas for me but I though with the kitty and all it would work. It is interesting anyway. The red cardstock is riding hood red, it is the exact red in the stripe of the paper! I used the Cuttlebug snowflakes and put chunky glitter on them and then a green gemstone in the middle. The sentiment is from circle of friends by SU, I still like them - they fit on these cards with large images real well.